티스토리 뷰
[Spring] SpringBoot 소스 코드 분석하기, SpringBootApplication의 run 메소드와 실행과정 - (5)
망나니개발자 2022. 2. 20. 10:00이번에는 SpringBoot의 실행 과정을 소스 코드로 직접 살펴보려고 합니다. 지난번에는 SpringBoot의 SpringBootApplication 객체를 생성하고 초기화하는 과정에 대해 자세히 살펴보았습니다. 이번에는 만들어진 SpringBootApplication를 통해 run 메소드를 호출하고 실행되는 과정에 대해 자세히 살펴볼 계획입니다.
아래의 내용은 SpringBoot 2.6.3를 기준으로 작성되었습니다.
1. SpringBootApplication의 run 메소드와 실행 과정
[ SpringBootApplication의 run 메소드 ]
앞선 포스팅에서 SpringApplicaiton 클래스의 run은 다음과 같이 구성되어 있음을 살펴보았다. 이번에는 최종적으로 호출되며 실제 run 로직이 구현되어 있는 코드를 살펴보도록 하자.
public class SpringApplication {
    ...

    public static ConfigurableApplicationContext run(Class<?> primarySource, String... args) {
        return run(new Class<?>[] { primarySource }, args);
    }

    public static ConfigurableApplicationContext run(Class<?>[] primarySources, String[] args) {
        return new SpringApplication(primarySources).run(args);
    }


    public ConfigurableApplicationContext run(String... args) {
        // 실제 run 로직 존재
    }
    ...
}
SpringBoot 애플리케이션의 run 내부 로직은 상당히 복잡하지만, 중요한 부분을 중심으로 차근차근 살펴보도록 하자.
public ConfigurableApplicationContext run(String... args) {

    // 1. StopWatch로 실행 시간 측정 시작
    StopWatch stopWatch = new StopWatch();
    stopWatch.start();

    // 2. BootStrapContext 생성
    DefaultBootstrapContext bootstrapContext = createBootstrapContext();
    ConfigurableApplicationContext context = null;

    // 3. Java AWT Headless Property 설정
    configureHeadlessProperty();

    // 4. 스프링 애플리케이션 리스너 조회 및 starting 처리
    SpringApplicationRunListeners listeners = getRunListeners(args);
    listeners.starting(bootstrapContext, this.mainApplicationClass);
    try {

        // 5. Arguments 래핑 및 Environment 준비
        ApplicationArguments applicationArguments = new DefaultApplicationArguments(args);
        ConfigurableEnvironment environment = prepareEnvironment(listeners, bootstrapContext, applicationArguments);

        // 6. IgnoreBeanInfo 설정
        configureIgnoreBeanInfo(environment);

        // 7. 배너 출력
        Banner printedBanner = printBanner(environment);

        // 8. 애플리케이션 컨텍스트 생성
        context = createApplicationContext();
        context.setApplicationStartup(this.applicationStartup);

        // 9. Context 준비 단계
        prepareContext(bootstrapContext, context, environment, listeners, applicationArguments, printedBanner);

        // 10. Context Refresh 단계
        refreshContext(context);

        // 11. Context Refresh 후처리 단계
        afterRefresh(context, applicationArguments);

        // 12. 실행 시간 출력 및 리스너 started 처리
        stopWatch.stop();
        if (this.logStartupInfo) {
            new StartupInfoLogger(this.mainApplicationClass).logStarted(getApplicationLog(), stopWatch);
        }
        listeners.started(context);

        // 13. Runners 실행
        callRunners(context, applicationArguments);
    }
    catch (Throwable ex) {
        handleRunFailure(context, ex, listeners);
        throw new IllegalStateException(ex);
    }

    try {
        listeners.running(context);
    }
    catch (Throwable ex) {
        handleRunFailure(context, ex, null);
        throw new IllegalStateException(ex);
    }
    return context;
}
해당 단계는 크게 다음과 같은 순서로 나눌 수 있다.
- StopWatch로 실행 시간 측정 시작
- BootStrapContext 생성
- Java AWT Headless Property 설정
- 스프링 애플리케이션 리스너 조회 및 starting 처리
- Arguments 래핑 및 Environment 준비
- IgnoreBeanInfo 설정
- 배너 출력
- 애플리케이션 컨텍스트 생성
- Context 준비 단계
- Context Refresh 단계
- Context Refresh 후처리 단계
- 실행 시간 출력 및 리스너 started 처리
- Runners 실행
1. StopWatch로 실행 시간 측정 시작
제일 먼저 보이는 부분은 StopWatch를 이용해 시간 측정을 시작하는 부분이다. SpringBoot를 실행하면 다음과 같이 실행 시간이 나오는데, run 안에서 가장 먼저 측정을 시작함을 확인할 수 있다.

2. BootStrapContext 생성
그 다음은 BootStrapContext를 생성하는 createBootstrapContext 단계이다. BootStrapContext란 애플리케이션 컨텍스트가 준비될 때 까지 환경 변수들을 관리하는 스프링의 Environment 객체를 후처리하기 위한 임시 컨텍스트이다. 그 외에도 SpringApplication의 run이 호출될 때나 애플리케이션 컨텍스트가 준비가 마무리되었을 때 호출되기 위한 리스너들을 등록할 수 있다. createBootstrapContext 내부는 다음과 같이 구현되어 있다.
private DefaultBootstrapContext createBootstrapContext() {
    DefaultBootstrapContext bootstrapContext = new DefaultBootstrapContext();
    this.bootstrapRegistryInitializers.forEach((initializer) -> initializer.initialize(bootstrapContext));
    return bootstrapContext;
}
가장 먼저 DefaultBootstrapContext 객체를 생성해준다. 그리고 앞선 포스팅에서 spring.factories에서 불러왔던 bootstrapRegistryInitializers를 모두 DefaultBootstrapContext에 초기화해주고 있다.
그리고 이제 ApplicaitonContext를 선언해주는데, null로 선언만하고 객체의 생성은 아래에서 해주므로 이따가 다시 살펴보도록 하자.
3. Java AWT Headless Property 설정
Java AWT Headless 모드는 모니터나 마우스, 키보드 등의 디스플레이 장치가 없는 서버 환경에서 UI 클래스를 사용할 수 있도록 하는 옵션이다. 예를 들어 서버에서 이미지를 만들어 반환해주어야 하는 경우에 이미지 관련 클래스 등이 필요할 수 있다. 만약 Headless 모드를 주지 않으면 해당 클래스의 사용이 불가능하고 에러가 발생하는데, 이때 Headless 모드를 true로 주면 사용 불가능한 UI 클래스들을 특별 객체로 만들어준다. 대표적으로 java.awt.Toolkit의 경우 특별하게 headless 전용 객체로 만들어서 디스플레이 장치가 없어도 사용할 수 있게 해준다. 만약 headless 모드인데 디스플레이 장치가 필수인 기능(화면에 띄우는 기능 등)를 호출한다면 Headless 에러를 던진다.
SpringBoot에서는 기본적으로 headless 모드를 true라서 java.awt 등의 패키지를 사용해 이미지 관련 처리를 할 수 있다.
private boolean headless = true;

private void configureHeadlessProperty() {
    System.setProperty(SYSTEM_PROPERTY_JAVA_AWT_HEADLESS,
        System.getProperty(SYSTEM_PROPERTY_JAVA_AWT_HEADLESS, Boolean.toString(this.headless)));
}
4. 스프링 애플리케이션 리스너 조회 및 starting 처리
여기서는 애플리케이션 컨텍스트를 준비할 때 호출되어야하는 리스너들을 찾아서 BootStrapContext의 리스너로써 실행하게 해준다. 예를 들어 생성 시간이 긴 객체들의 경우 객체 생성을 위한 리스너를 만들어 등록하면 BootStrapContext가 애플리케이션 컨텍스트를 준비함과 동시에 객체를 생성하도록 함으로써 Lazy하게 접근가능하는데 사용할 수 있다.
private SpringApplicationRunListeners getRunListeners(String[] args) {
    Class<?>[] types = new Class<?>[] { SpringApplication.class, String[].class };
    return new SpringApplicationRunListeners(logger,
        getSpringFactoriesInstances(SpringApplicationRunListener.class, types, this, args),
        this.applicationStartup);
}

private <T> Collection<T> getSpringFactoriesInstances(Class<T> type, Class<?>[] parameterTypes, Object... args) {
    ClassLoader classLoader = getClassLoader();
    // Use names and ensure unique to protect against duplicates
    Set<String> names = new LinkedHashSet<>(SpringFactoriesLoader.loadFactoryNames(type, classLoader));
    List<T> instances = createSpringFactoriesInstances(type, parameterTypes, classLoader, args, names);
    AnnotationAwareOrderComparator.sort(instances);
    return instances;
}
위의 리스너를 조회하는 코드를 보면 또 다시 spring.factories에서 SpringApplicationRunListener를 Key로 대상을 조회하는데, 왜 스프링이 loadFactoryNames에 캐싱을 적용했는지 이해할 수 있다.
앞선 포스팅의 BootstrapRegistryInitializer 단계에서 이미 모든 jar 파일에서 spring.factories를 조회해 캐싱해둔 상태이므로 메모리에서 빠르게 조회할 수 있다. 그리고 조회된 대상을 객체로 만들어 BootStrapContext에 연결해서 실행한다.
참고로 현재 버전 기준으로 SpringApplicationRunListener의 구현체로는 컨텍스트 시작 중에 리스너에게 애플리케이션의 시작 및 실행 단계를 알리기 위한 EventPublishingRunListener 밖에 존재하지 않는다. 그럼에도 불구하고 스프링은 인터페이스를 분리하여 추상화에 매우 노력하고 있음을 확인할 수 있다.
5. Arguments 래핑 및 Environment 준비
그 다음은 String[] 형태의 인자를 스프링 부트를 위한 인자인 ApplicationArguments로 래핑해준다. 그리고 이를 Environment 준비하는 prepareEnvironment에 넘겨주는데, prepareEnvironment코드를 보면 다음과 같다.
private ConfigurableEnvironment prepareEnvironment(SpringApplicationRunListeners listeners,
        DefaultBootstrapContext bootstrapContext, ApplicationArguments applicationArguments) {
    // Create and configure the environment
    ConfigurableEnvironment environment = getOrCreateEnvironment();

    ...

    return environment;
}
가장 먼저 애플리케이션 타입에 맞게 Environment 구현체를 생성해주고 있다.
private ConfigurableEnvironment getOrCreateEnvironment() {
    if (this.environment != null) {
        return this.environment;
    }
    switch (this.webApplicationType) {
    case SERVLET:
        return new ApplicationServletEnvironment();
    case REACTIVE:
        return new ApplicationReactiveWebEnvironment();
    default:
        return new ApplicationEnvironment();
    }
}
그 다음에 만들어진 Environment에 Property나 Profile 등과 같은 값들을 셋팅해주고 SpringApplication에 바인딩해준다.
6. IgnoreBeanInfo 설정
BeanInfo란 JSP에서 사용되는 기술인 자바 빈즈(Java Beans)를 위한 빈 정보를 의미한다. 오늘날 더이상 자바 빈즈를 사용하지 않으므로 자바 빈즈 작업을 처리하지 않도록 설정해주는 부분이다.
private void configureIgnoreBeanInfo(ConfigurableEnvironment environment) {
    if (System.getProperty(CachedIntrospectionResults.IGNORE_BEANINFO_PROPERTY_NAME) == null) {
        Boolean ignore = environment.getProperty("spring.beaninfo.ignore", Boolean.class, Boolean.TRUE);
        System.setProperty(CachedIntrospectionResults.IGNORE_BEANINFO_PROPERTY_NAME, ignore.toString());
    }
}
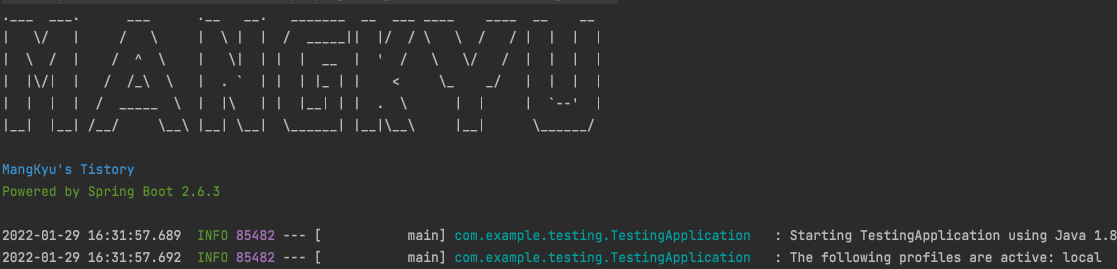
7. 배너 출력
그 다음은 배너를 출력하는 부분이다. 스프링 부트 애플리케이션을 실행하면 배너가 출력된다.
다음과 같이 출력되는 배너의 텍스트 및 색상을 바꿀수도 있고, gif 형태의 배너를 띄울 수도 있다. 관심있으신 분들은 배너를 커스터마이징해보는 것도 재미있을 것 같다. 배너 수정은 Generator로 배너를 만들고 resources 하위에 banner.txt를 넣어주면 된다.
8. 애플리케이션 컨텍스트 생성
드디어 진짜 애플리케이션 컨텍스트를 생성하는 부분이다. 애플리케이션 컨텍스트를 생성하는 코드는 다음과 같은데, 팩토리 클래스에게 생성을 위임하는 것을 확인할 수 있다.
private ApplicationContextFactory applicationContextFactory = ApplicationContextFactory.DEFAULT;

protected ConfigurableApplicationContext createApplicationContext() {
    return this.applicationContextFactory.create(this.webApplicationType);
}
애플리케이션 컨텍스트 생성을 위해서도 webApplicationType가 사용되고 있는데, 해당 값을 팩토리 클래스의 create 메소드의 인자로 넘겨주고 있다. 팩토리 클래스에서는 해당 타입을 통해 다음과 같은 3가지 애플리케이션 타입 중 하나를 생성하여 반환하고 있다.
@FunctionalInterface
public interface ApplicationContextFactory {

    ApplicationContextFactory DEFAULT = (webApplicationType) -> {
        try {
            switch (webApplicationType) {
            case SERVLET:
                return new AnnotationConfigServletWebServerApplicationContext();
            case REACTIVE:
                return new AnnotationConfigReactiveWebServerApplicationContext();
            default:
                return new AnnotationConfigApplicationContext();
            }
        }
        catch (Exception ex) {
            throw new IllegalStateException("Unable create a default ApplicationContext instance, "
                + "you may need a custom ApplicationContextFactory", ex);
        }
    };

    ConfigurableApplicationContext create(WebApplicationType webApplicationType);

    static ApplicationContextFactory ofContextClass(Class<? extends ConfigurableApplicationContext> contextClass) {
        return of(() -> BeanUtils.instantiateClass(contextClass));
    }

    static ApplicationContextFactory of(Supplier<ConfigurableApplicationContext> supplier) {
        return (webApplicationType) -> supplier.get();
    }
}
SpringApplication에서는 어떠한 ApplicationContext 구현체들이 존재하고 만들어지는지 알 필요가 없다. 그래서 애플리케이션 컨텍스트 객체의 생성은 팩토리로 위임하고, SpringApplication에서는 3가지 타입의 공통된 계층인 ConfigurableApplicationContext를 받음으로써 추상화하고 있다. 그리고 생성된 애플리케이션 컨텍스트에는 애플리케이션 실행 시의 측정 항목(startup metrics)를 담당하는 ApplicationStartup을 설정해준다.
9. Context 준비 단계
Context 준비 단계는 Context가 생성된 후에 해주어야 하는 후처리 작업들과 빈들을 등록하는 refresh 단계를 위한 전처리 작업 등이 수행된다. 다음의 소스 코드를 참고해서 어떠한 작업들이 진행되는지 살펴보도록 하자.
private void prepareContext(DefaultBootstrapContext bootstrapContext, ConfigurableApplicationContext context, ConfigurableEnvironment environment, SpringApplicationRunListeners listeners, ApplicationArguments applicationArguments, Banner printedBanner) {
    context.setEnvironment(environment);
    postProcessApplicationContext(context);
    applyInitializers(context);
    listeners.contextPrepared(context);
    bootstrapContext.close(context);
    if (this.logStartupInfo) {
        logStartupInfo(context.getParent() == null);
        logStartupProfileInfo(context);
    }
    // Add boot specific singleton beans
    ConfigurableListableBeanFactory beanFactory = context.getBeanFactory();
    beanFactory.registerSingleton("springApplicationArguments", applicationArguments);
    if (printedBanner != null) {
        beanFactory.registerSingleton("springBootBanner", printedBanner);
    }
    if (beanFactory instanceof AbstractAutowireCapableBeanFactory) {
        ((AbstractAutowireCapableBeanFactory) beanFactory).setAllowCircularReferences(this.allowCircularReferences);
        if (beanFactory instanceof DefaultListableBeanFactory) {
            ((DefaultListableBeanFactory) beanFactory)
                .setAllowBeanDefinitionOverriding(this.allowBeanDefinitionOverriding);
        }
    }

    ...
}
가장 먼저 앞서 생성했던 Environment를 애플리케이션 컨텍스트에 설정해주고 있다. 그리고 이전의 작업들을 진행하면서 beanNameGenarator(빈 이름 지정 클래스), resourceLoader(리소스를 불러오는 클래스), conversionService(프로퍼티의 타입 변환) 등이 생성되었으면 싱글톤 빈으로 등록해주고, 앞선 SpringApplication 생성 단계에서 찾았던 initializer들을 initialize 해주는 등의 작업이 진행된다.
그리고나면 애플리케이션 컨텍스트가 생성되었고, initializer들의 initialize까지 진행되었으므로 더이상 BootStrapContext는 불필요하여 BootStrapContext를 종료해주고 있다.
그리고 래핑한 ApplicationArguments와 배너 클래스를 빈으로 등록해주고, 순환 참조 여부와 빈 정보 오버라이딩 여부를 설정해주고 있다. 기본적으로 순환 참조는 불가능하며, 순환 참조가 발생하면 다음과 같은 에러가 발생하며 애플리케이션이 종료된다. (물론 생성자 주입일 경우에만 실행 시점에 발생하고, @Autowired 필드 주입인 경우에는 호출 시에 발생한다. 그러므로 우리는 생성자 주입을 사용해야 한다.) 마찬가지로 동일한 이름의 빈이 여러 개 있을 경우에도 에러가 발생하고 애플리케이션이 종료된다.

하지만 SpringApplicationBuilder나 properties를 통해 해당 옵션을 변경할 수 있는데, 그러면 순환 참조가 발생해도 에러를 발생하지 않으며, 동일한 이름의 빈이 있으면 덮어씌우며 애플리케이션이 정상 실행된다. 물론 순환 참조 여부와 빈 정보 오버라이딩 여부는 모두 기본값이 false이며 가급적이면 기본값을 사용하도록 하는 것이 좋다.
이후에 소스 코드에서는 생략했지만 LazyInitialize Bean을 처리하는 빈 팩토리 후처리기를 등록하고, 소스들을 불러오고, 컨텍스트에 리스너들을 연결하면서 Context 준비 단계를 마무리한다.
10. Context Refresh 단계
refreshContext() 메소드에서는 우리가 만든 빈들을 찾아서 등록하고 웹서버를 만들어 실행하는 등의 핵심 작업들이 진행된다. 즉, refresh 단계를 거치면 모든 객체들이 싱글톤으로 인스턴스화되는데, 만약 에러가 발생하면 등록된 모든 빈들을 제거한다. 그래서 refresh 단계를 거치면 모든 빈이 인스턴스화 되었거나 어떠한 빈도 존재하지 않거나 둘 중 하나의 상태가 된다.
애플리케이션 컨텍스트에서 가장 중요한 단계이고, 꽤나 복잡하므로 이어지는 다음 포스팅에서 자세히 살펴보도록 하자.
11. Context Refresh 후처리 단계
애플리케이션 컨텍스트의 refresh 단계가 마무리되고 나서 후처리하는 단계이다. 과거에는 애플리케이션 컨텍스트 생성 후에 초기화 작업을 위한 ApplicationRunner, CommandLineRunner를 호출하는 callRunners()가 내부에 존재했지만 현재는 별도의 단계로 빠져서 메소드가 비어있는 상태이다. Runner들에 대해서는 아래에서 자세히 살펴보도록 하자.
12. 실행 시간 출력 및 리스너 started 처리
이후에 애플리케이션을 시작하는데 걸린 시간을 로그로 남기고 리스너들을 started 처리하고 있다.

13. Runners 실행
드디어 진짜 마지막 단계인 Runner들을 호출하는 단계이다. 우리는 때로 애플리케이션이 실행된 이후에 초기화 작업을 필요로 하는 경우가 있다. 그럴때 사용할 수 있는 선택지 중 하나가 Runner를 등록하는 방법이다. Runner에는 총 2가지가 존재하는데, String을 파라미터로 필요로하는 넘기는 경우에는 CommandLineRunner를, 다른 타입을 파라미터로 필요로 하는 경우에는 ApplicationRunner를 사용할 수 있다.
@Component
public class MyInitializer implements CommandLineRunner {

    @Override
    public void run(String... args) {
        System.out.println("애플리케이션 실행 이후에 초기화 작업이 필요합니다");
    }
}
위와 같이 Runner를 구현하게 하고, 빈으로 등록하면 callRunner에서는 CommandLineRunner과 ApplicationRunner 구현체들을 찾아서 run 메소드를 호출시킨다.
private void callRunners(ApplicationContext context, ApplicationArguments args) {
    List<Object> runners = new ArrayList<>();
    runners.addAll(context.getBeansOfType(ApplicationRunner.class).values());
    runners.addAll(context.getBeansOfType(CommandLineRunner.class).values());
    AnnotationAwareOrderComparator.sort(runners);
    for (Object runner : new LinkedHashSet<>(runners)) {
        if (runner instanceof ApplicationRunner) {
            callRunner((ApplicationRunner) runner, args);
        }
        if (runner instanceof CommandLineRunner) {
            callRunner((CommandLineRunner) runner, args);
        }
    }
}
실제로 실행해보면 다음과 같이 애플리케이션 컨텍스트가 띄워지고 자동으로 호출되는 것을 확인할 수 있다.

그 동안에 살펴봤던 ConfigurableEnviornment, ConfigurableApplicationContext, createApplicationContext 등을 보면 상당히 추상화를 잘해두었고, 이를 통해 여러 구현체들이 있어도 인터페이스를 통해 빈을 찾는 등의 코드를 자주 접할 수 있었다. 하지만 위의 Runner 구현은 다음의 이유들로 깔끔하지 못하다는 느낌이 든다.
- CommandLineRunner와 ApplicationRunner 모두 동일한 Runner인데 공통 타입으로 추상화가 되지 않았음
- 새로운 Runner가 만들어질 때마다 callRunners 코드를 수정해야 함
- callRunners 내부에서 instanceOf로 구현 클래스를 나누어 세부 구현을 파악함
물론 CommandLineRunner와 ApplicationRunner가 @FunctionalInterface 인터페이스이기 때문에 서로 다른 파라미터를 가져야 해서라고 이야기할 수 있지만, 그래도 최소한 최선의 방법은 아닌 것 같다는 생각이 든다. 적어도 스프링답지 못하다는 생각이 계속 들게하는 코드인 것 같다. (아닐수도 있습니다ㅎㅎ)
지금까지 SpringBootApplication 객체가 만들어진 후에 run 메소드를 호출하여 어떠한 과정으로 애플리케이션 컨텍스트가 준비되는지 살펴보았다. 역시 하나의 애플리케이션 컨텍스트를 실행하기 위해 상당히 복잡한 과정들이 진행됨을 확인할 수 있었고, 큰 그림에서 이해할 수 있었다. 다음으로는 애플리케이션 컨텍스트에서 가장 중요한 단계인 refreshContext 단계를 살펴보도록 하자.
refreshContext에서는 빈들을 찾아서 객체로 만들고 의존성 주입을 해주는 등의 작 업이 진행된다.
위의 내용들은 개인적으로 공부를 하면서 작성을 한 내용이라 충분히 틀리거나 잘못된 내용들이 있을 수 있습니다. 혹시 수정 또는 추가할 내용들을 발견하셨다면 댓글 남겨주세요! 반영해서 수정하도록 하겠습니다:)
관련 포스팅
- SpringBoot 소스 코드 분석하기, SpringBoot의 장점과 특징 - (1)
- SpringBoot 소스 코드 분석하기, 애플리케이션 컨텍스트(Application Context)와 빈팩토리(BeanFactory) - (2)
- SpringBoot 소스 코드 분석하기, @SpringBootApplication 어노테이션의 속성과 구성요소 - (3)
- SpringBoot 소스 코드 분석하기, SpringBootApplication의 생성과 초기화 과정 - (4)
- SpringBoot 소스 코드 분석하기, SpringBootApplication의 run 메소드와 실행과정 - (5)
- SpringBoot 소스 코드 분석하기, 애플리케이션 컨텍스트(ApplicationContext)의 refreshContext 동작 과정 - (6)
- SpringBoot 소스 코드 분석하기, DispatcherServlet(디스패처 서블릿) 동작 과정 - (7)